Thursday 29 January 2015

Winter Wisdom: Clothing and Layers


When the temperature plunges to sub-zero temperatures, your primary concern should be staying warm.  The cold isn't just some sort of discomfort; you can die from exposure to cold weather.

It might seem counter-intuitive but it's also important to stay cool.  The physical activity of riding a bicycle generates a lot of heat.  Heat means sweat, sweat means wet and being wet in the cold is the last thing you want.

This is why it is very important to wear the right kind of clothing, in the right amount.  Experienced winter cyclists layer their clothing.

Base Layer
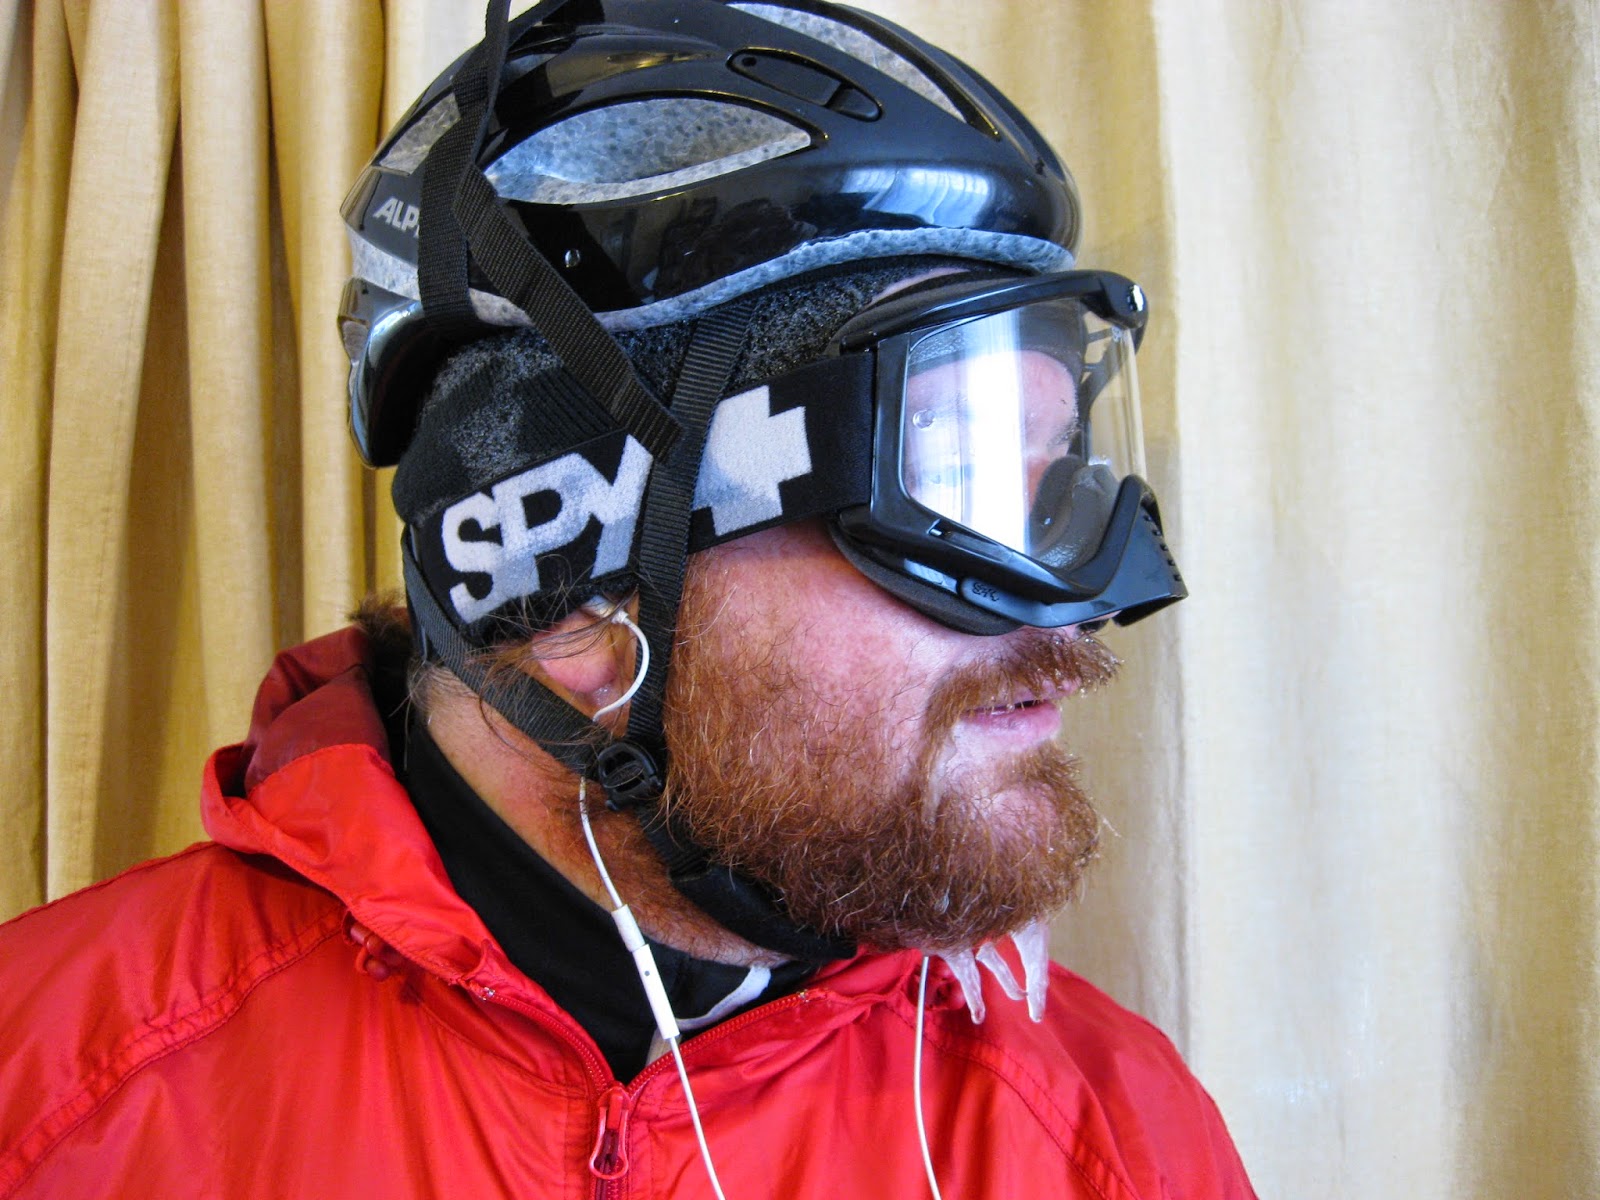
My facial hair, the ultimate base layer!
You want to keep sweat far away from your skin.  Sweat is one of those things that happens while winter cycling.    Sometimes you will be sweaty before you even set foot out the door; the pre-sweat while wearing several layers and trying to tie up your boots.

The best way to keep that sweat off your skin is to use clothing that wicks, or draws liquid away from you.

In my not-so-humble opinion, the best material is either wool or synthetics designed specifically for wicking.  Do not use cotton unless you enjoy being cold and miserable!  It does not wick well and loses all insulating qualities when wet.

My base layer almost always has a padded layer for where my ass meets the seat.  Depending on the level of cold, I either use cycling shorts or a cycling liner (think underwear with the pad from cycling shorts).  Old cycling shorts are great for this purpose.  The material is usually a synthetic material that can wick the sweat away from your skin.

For a shirt I either use a winter cycling jersey or a polyester workout shirt.  If I'm using the latter it's because I'm using the jersey as a mid-layer.  Typically the jersey is really warm and I can usually get away with just that.

For my feet I will use merino wool socks or wool socks.  Usually I will have the wool socks when I'm using merino wool as a mid layer.

For pants I use a pair of Pearl Izumi Thermal Tights or a pair of MEC Watchtower workout pants.  Both keep me fairly warm and wick very well.

Shell Layer
For me, the most important thing about the shell layer is that it be wind and water resistant.  Wet means cold, you want to avoid this if possible.  Wind will make you cold very fast, if you can keep it out you will stay warm a lot longer.

It's important to note that a shell layer isn't always required.  If it is not too cold, you can get away with just your mid layer, or even a warm base layer.  If it is snowing, a shell is advised.  Even if the precipitation in question is very frozen, it will melt when it comes in contact with you and you will get wet.

Coat and pants should be wind and water resistant.  The best material is Gore-Tex or similar, as it is both wind and water resistant, and the material breathes as well.  Some rain jackets and pants work well if they have flaps to vent or circulate.  If your gear doesn't breathe it will still be very effective at very cold temperatures.  My current gear is not breathable but I can skip my mid layer entirely.  Speaking of which...

Mid Layer
The middle layer (or layers) serve two main purposes, insulation and moisture transfer.  No matter what you do, you will end up sweating while cycling in the winter.  You want that moisture to transfer out to the middle layer so that wetness isn't up against your skin.  Therefore it's important to wear clothing that still insulates while wet.

Wool has great thermal properties which continue to insulate even when wet.  There are synthetic materials that are pretty good at insulating and wicking moisture.  Fleece and down can insulate while wet but aren't great at moisture transfer, so if using these, keep them on the "outer" mid layer.  Avoid cotton at all costs, it is a terrible insulator when wet.

Miscellaneous Layers
The one thing I usually add an extra layer to are my knees.  My knees are in great shape and I'd love to keep them that way.  Knees don't have a lot of blood pumping through them and can get cold pretty fast.  I have knee warmers that I usually add under my base layer.  They're synthetic, wicking and help keep my knees toasty warm.

My cheap pogies keep me warmer than gloves.
Gloves really depend on how long I've been in the cold and whether I'm using pogies or not.  Pogies on a bike will keep your hands surprisingly warm.  They keep the wind off your hands entirely.  Many rides I've gone bare handed in my pogies.  I usually have a pair of wool one-size-fits-all gloves and a pair of MEC cycling gloves in a pocket.  If it does start getting cold, on go the MEC gloves.  Even colder?  The wool gloves, then the MEC gloves.  I have heavier gloves but I've yet to need them.

Eyewear is always a must. Either I'm wearing sunglasses or I'm wearing goggles.  The key factors are temperature and wind.  If it's windy enough to make my eyes tear up, I'm putting on goggles.  One day I'll get some tinted lenses for my goggles and get the best of both worlds.  I always carry a pair of folding goggles as a back-up in case my sunglasses or goggles break.

Since I'm a natural klutz, I always wear a helmet.  I have a thin toque that stretches over my ears and fits quite comfortably under my helmet.  If it gets very cold I usually have a warmer toque I can wear under my helmet.  For the rest of my face, my beard is my base layer.  When it gets very cold I put on a face mask that can convert to a scarf.  Frequently I will flip it back and forth depending if I'm facing the wind or not.

My base layer for my face is ... my beard!  It insulates and breathes better than anything else on the market.  Sometimes my face needs a second layer.  I have a Seirus face mask for that.  It can convert between covering my face and being a scarf.  Some days I am constantly switching back and forth between modes to get that perfect balance of hot and cold.

Boots are always a requirement.  Boots should be wind and water proof.  I keep 2 sets of boots for this purpose.  One is a pair of Merrelle hiking boots that are windproof and water resistant.  The other is a roomier pair of Merrelle Opti-Warm boots that can accommodate multiple layers of socks.

Mixing the Layers
In reality there isn't a firm "You must wear these 3 layers."  In fact I often mix and match my layers.
Depending on the inclement weather and how warm you are, sometimes you can skip the mid layer and just use a shell, skip the shell and use one (or more) mid layers, or sometimes skip both entirely if it's warm enough.

When the temperature is -5C or warmer, I will often go with my base layer and my hiking boots.  If it is very cold but not windy or snowing, I will keep adding on mid-layers.  If it is -15C and very windy, I will skip the mid layer and go right to a shell and my bigger boots.

There are times when you might want to mix things up on the go.  For example, on a long ride you might want to be wearing warmer apparel by hour 3 than you would at the start of your ride.  Extra layers can be stowed in a backpack or a rack trunk.

It's All About You
I recently read an article that dictated what you should wear at various temperatures.  I got a good laugh out of it.  If I followed that guide I'd be overheating like mad!  There are many factors that come into play, such as weather, temperature, air pressure, proximity to heat sinks (large bodies of water, urban areas) and so on.  But just as important are factors that are all about you.  Your age, your weight, your gender, how acclimated you are to the cold.  Even your grooming style plays a factor; my long hair and beard have been helpful insulators during the winter.

As I mentioned before, your physical activity also generates heat.  This means you are like a personal heating unit.  If you want to turn the heat up, just pedal harder.  Getting too hot?  Pedal more slowly.

The best I can recommend is, write down what you wear and record how you felt at different times on your bicycle ride.  Take note of things such as the time of day, the temperature, how much effort you put in, what you are wearing and speed/direction of the wind (and how exposed you were to it).  Eventually you will accumulate enough data to know exactly what you need to wear, and when.

In other words, there's no substitute for experience.  Crack out your bike and shred some snow!


Tuesday 27 January 2015

To Boldly Go Where No Bicycle Has Gone Before

Being happy about winter is a still a new sensation to me.  In previous winters I was very unhappy with the weather and climate.  Ice storms used to mean a dangerous time walking or driving, now it means putting my studded tires to the test.  Snow squalls used to be a call to stay inside, now it's a siren call to hit the road.

My studded tires, hungry for some ice and snow.
This particular Sunday I found myself in a bit of a lull.  No inclement weather, things had actually warmed up and even side roads were becoming bare and dry.  Not exactly the kind of ride I crave; I can ride on plenty of bare roads all spring/summer/fall.

I thought I would give the lake another try.  If it was safe there would be plenty of people fishing on a Sunday.  I know I'd feel a lot safer knowing there were lots of people around who could help if something bad were to happen.

How I wish all the trails nearby were like this.
I made my way to the trail that accesses the river.  My traction was great today.  Normally I sink deeper than a typical snowmobile does.  But this trail is pretty narrow and heavily trafficked.  As I was about to discover, there is a lot of pick-up truck traffic that goes through the same trail.  All this traffic packed the snow down making it easy (well, easier) to navigate.  I'm really glad I have access to trails like this; most trails in my area can't be navigated without a fat bike.

Sharing the trial with fellow winter enthusiasts.
In the case of winter off-road trails my plan is the same; yield to everyone else.  Snowmobiling is an extremely popular activity in my area and I'd rather have the snowmobile community looking upon me favourably.  The same goes for other trail users; I don't mind yielding to a XC skier, someone snowshoeing or someone simply driving their pick-up to their fishing locale.  After all, I'm the new kid on the block here.

The tiny specs in the distance are people, trucks, sheds and snowmobiles.
As I arrived on the shoreline I could see people in the distance.  This was great news to me.  Being alone and far from help made me hesitant to traverse the ice.  Lots of people around meant lots of help in case I fell through the ice.  I'm also pretty certain they wouldn't be out there fishing if it wasn't safe.

Venturing out, my first surprise was just how cold it was out here.  Being on a frozen body of water meant there was literally nothing blocking the wind.  The river that connected to the lake is also a major east/west corridor to the Great Lakes.  Wind just rips down this corridor unimpeded.

Other than the occasional buzz of auger or motor, it's very
serene and quiet out here.
After getting a taste of that first hand, I can completely understand why an ice fishing hut makes sense.  Just cutting that kind of wind would help keep you a lot warmer.  In fact a lot of those shacks took it a step further, you could see exhaust ports from heated sheds.  That being said, there were also people just fishing out in the open.  These hardy individuals would show up with gear and an auger on their snowmobile and fish right in the open.  Imagine how cold they were!

Unless partially submerged, trucks on the ice are a good sign.
As I made my way into the mini village of fishing huts and pick-up trucks, I could see curious onlookers checking me out.  I was possibly the first person they had seen cycling on the lake.  Well, can't blame them, I was just as curious about them.  I have never been ice fishing in my life.  I actually have a full set of ice fishing gear; this trip has me wondering if I could fit my gear on my bike and head out here.  There is definitely an allure to this niche form of fishing.

My tires finally got the taste of snow they were looking for.
The conditions on the ice were not what I expected at all.  I had envisioned myself carving through the ice, having full traction in a glassy sea of slipperiness.  The reality was very different than the notions in my head.  I encountered just about every kind of snow I had seen on roads; powder snow, packed snow, packing snow, crust, snirt and slush.  One moment the ice was bare, the next I'd run into a drift so high my momentum barely carried me through it.  It's the nature of the lake ice in a large open area with lots of wind.  The wind just blows the snow all over the place.  The only thing you can expect is the unexpected.

You can't escape pot holes, not even on lake ice.
Snow aside, you couldn't even count on a flat surface.  The ice expands and contracts with variances in temperature, leaving ridges formed from cracks.  In the summer you can see rocks above the water in shallower spots; these were now dangerous as they were hidden with snow.  The one event I wasn't ready for were the ice fishing holes.  They're like potholes on steroids.

An ice fishing hole.   Very jarring to run over on a bicycle.
I got close enough to look into one of the recent holes.  The ice looked at least 40  cm deep.  Strong enough to hold all these trucks and ice fishing sheds.  I knew I was safe but I could feel fear surging as soon as I saw the water below.  I made a mental note to try to stay away from looking at the ice or thinking about falling through.

There are also cracks in the ice which can be unnerving.  The cracks form from various stresses such as the ice contracting and expanding as it heats up and cools off.  At 40 cm thick there really is nothing to worry about.

The ice is literally floating on the water.
Tire wise I felt like I was riding around on one of the better selections.  I think the ideal for this would be studded knobby fat tires.  But my Ice Spiker Pro's, a studded knobby tire, worked out really well.  If I had the budget, I would probably get wider rims; they would stretch out my existing tire, letting me run at a lower pressure and float a bit more.  Widening the tire would also put more studs and knobs in contact with the snow and ice.

The trails in and out are almost as fun, but with more wind cover.

Being in the wind really put my gear to the test and I found a flaw in my configuration.  My feet were getting very cold.  To date I've been getting away with a pair of Merrelle windproof hiking boots and one pair of merino wool socks.  Next time I'd use my hardier pair of Merrelle boots (Opti-Warm) with a few more layers of socks.  Probably wool socks as they retain some insulating when they are wet.  I find cotton is terrible once you sweat through it.

While I did feel much safer with the increased presence of people, next time I planned on coming better prepared.  For starters, watching some Youtube videos on how to save yourself if you fall through the ice.  I'd also look into investing into some safety equipment to help get me out of trouble. I'm definitely looking forward to coming back and enjoying the frozen lake while I can.

Thursday 22 January 2015

Winter Wisdom: Know Your Snow!

A great day for a bike ride!
Intro
In this instalment of Winter Wisdom I will be going over different types of snow and ice.  Knowing what you are in for is the difference between enjoying a ride and eating a face full of snow.

Please note that this is specific to my experiences in Ontario; you may experience different winter conditions depending on where you live.

Powder snow with fresh tracks.
Types of Snow
They say no two snowflakes are alike.  But some are definitely more different than others.  When you start winter cycling you learn to identify different types of snow because it directly impacts your handling.

In general fat tires can float on top of it and narrow tires can cut through shallow snow. But it's not always that straightforward. Below are several types of snow and some general recommendations.

Powder
It's light, fluffy and usually has fallen recently.  If it is shallow it can be fun to cut through on a bicycle.  The deeper it gets, the more difficult it can be to pedal through.  Once it's about mid-calf it interferes with your pedals and becomes impossible to cycle through.  Having a fat tire enables you to float and you won't sink as deeply, which means you can handle deeper snow.  But even fat tires have their limits.
Snirt and road grit covering packed snow.

Packed
Snow that has been compressed by snow plows and vehicular traffic.  It is very dense and can be almost as hard as ice.  It can also be as slippery, especially if covered with a light layer of powder or snirt. Knobby tires and studs give great traction on this sort of snow.

Packing
Multi-layered crust.  The broken top layer makes it difficult
to continue with regular width mountain bike tires.
Think of snow that is perfect for snowballs; sticky and near it's melting point.  The closer it is to its melting point, the heavier it is. It can be cut through with narrow tires when it is shallow.  Knobby tires can provide good traction at various levels and densities of packing snow.  Fat tires can provide flotation on packing snow.

Crust
When the top layer of snow is stronger than the layer(s) below it. This is caused by the top layer partially melting during the day and then re-freezing when the temperature drops again, usually at night.   If a crust can hold the weight of a human it is considered to be "Supportable." If it cannot it is considered to be "Breakable." It is very possible to have a crust that is supportable when you are on foot but breakable when you are riding it on your bicycle. Studded or Knobby tires help with riding on supportable snow whereas breakable snow is extremely difficult to bike through.  Fat tires may be more supportable than skinnier tires but may also run into issues if the crust is very icy.

Slush
Made up of partially melted snow but more watery than packing snow.  Slush is formed when prevailing conditions begin to warm, or on road as a result of being heated and mixed by traffic.  Slush isn't very slippery on its own but contributes to decreased traction when coupled with ice or packed snow below it.  Its watery nature can be hazardous to a rider without fenders or mudguards.

Snirt
Snirt
This compound word describes what happens when snow is mixed with dirt, usually from plowing or from motorized traffic stirring up snow. It is brown to maple in colour. Snirt can be very slippery on it's own but becomes more treacherous on packed snow and ice.
Crust surrounded by powder snow.

Types of Ice
One very iced over bridge!
On paved roads, ice is usually formed from melting and re-freezing or from precipitation or other weather conditions.  In off road conditions ice is encountered commonly as a frozen body of water, such as a lake, river, pond, creek, et cetera.  Ice is extremely slick and dangerous.  Studded tires are usually advised for icy conditions.  Below are some specific subsets of ice to keep an eye out for.

Black Ice
A very thin layer of ice that is thin and transparent.  When formed on black asphalt it is nearly invisible, hence the name.  It can be dangerous if you ride on it unaware; studded tires handle black ice effectively.

Glaze ice
Usually a result of freezing rain, it literally glazes everything.  Road patches, other kinds of ice and snow and any part of the terrain will be coated.  Watch out for nearby trees; if they are coated as well they can be hazardous if they fall.

Pellets
Round small pellets of ice that either precipitate in that form or are formed from thawing and freezing.  This ice can be treacherous as it can vary in slipperiness and sinking can be common where it is deep.  There's no specific tire that is great for ice pellets; one patch might be great for fat tires and the next patch will give an advantage to knobby tires.  Approach with caution!

Spray Ice
This is formed near large bodies of water such as rivers which haven't frozen over.  Currents, depth and width all play a factor in a river not freezing.  But spray from the river will freeze very quickly. In a windy winter storm, crossing a bridge can feel a lot like being sandblasted by these particles. Bridges and adjacent roads

A pathway covered in frost.
Frost
When temperatures reach below freezing, frost can form.  It usually coats the ground with a very thin layer of ice crystals.  Soft rubber winter tires can  easily handle frost.  Normal tires can usually proceed fine in a straight line; some caution is required when handling in corners.

Conclusion
Getting to know snow and ice has definitely made my winter cycling experience a more enjoyable one.  Knowing what is on the ground and how my tires perform help me select routes where they will excel; it also enables me to avoid paths that will be a complete suckfest.

Your mileage may vary, pun intended!  There are many types of snow and ice not discussed here, such as glacial ice, firn, penitentes, watermelon snow and many others.  Hopefully this post gives you a head start; but there is no substitute for experience.  Get out there and ride!  


Monday 19 January 2015

The River and the Epic Ice Beard

When I looked at the temperature in the morning, it showed -12C with a "feels like" of -22C. It's been an unseasonably warm winter this year, so there really hasn't been an opportunity to acclimate to that kind of temperature.  It would be my coldest ride to date.

But hey, I didn't sign up for winter cycling because it was easy!

For clothing I wore what I usually would in slightly warmer temperatures (winter jersey, thermal tights, cycling liner, thin toque, merino wool socks, hiking boots).  I added some knee warmers underneath the tights and wore a rain coat as a waterproof layer on my upper half.  I also put a hydrapak on, inside the coat so it would stay warm enough.  Since I was planning on being out for more than an hour, I tossed an energy drink in a bottle cage.

Top view of goggles with foam cut out from vents.
It was cold enough out to justify wearing my goggles.  On previous trips I had problems with them fogging up.  I had tried a couple of fixes but they would always steam up when I was pedaling hard.  A fellow cyclist pointed out that a lot of goggles are vented but the vents are covered with foam.  The foam would tend to keep heat and moisture in the goggles, defeating the purpose of having vents.  Since they weren't doing me any good as-is, I decided to cut the foam away from the top vents.  I kept it in place for the side and lower vents.

Usually I would try hitting the water front and make my way to the parkway.  But I've been trying the same thing for two weeks and I end up having to walk my bicycle through the snow.  This time around I thought I'd try a more direct route.

I was a bit nervous about taking a county road.  In my area the county roads have paved shoulders but that's also where the plowed snow sits.  Lately the plow trucks have been pushing the snow further away from the road.  The effect has also been enhanced by people snowmobiling next to the road.  Not the best surface for a regular bicycle tire but it was perfect for my Ice Spiker Pros.

I was hoping for some luck with the parkway.  I hadn't been out that way for quite some time due to the deeper snow.  There is no snow maintenance but I was hoping the cold made a crust that could support my bicycle.  Unfortunately it didn't turn out well.  There was a crust that would support me when I stood on it but the bike kept breaking the surface and sinking.  I still might have been able to follow the deeper vehicle tracks but drifting powder snow ended up filling them up.

With nowhere else to go, I took the only low-speed route out of town.  While most county roads have a limit of 80 km/h, this particular road topped out at 60km/h.  It wasn't well plowed and ran parallel to one of the best maintained roads in the area.  Most vehicular traffic was local and the road was nice and quiet.

I had made it out to the bridge when I got to thinking about riding on the frozen water.  To be honest it's been a recurring thought ever since I got studded tires in the fall.  I pictured myself rolling unencumbered on the icy surface, with a cheshire cat grin on my face.

After some scouting I found the entrance to get inside.  It was laden with many tracks from pick up trucks, cars, snowmobiles and ATV's.  The winter traffic on the trail packed down the snow enough so I didn't sink.  It was still challenging to ride on but in a fun sort of way.

One of my concerns about winter off-road cycling was about other trail users.  How would they react to sharing with a cyclist?  Would I be accepted as a fellow outdoorsman?  Or would I be shunned for my non-motorized form of transport?

So far it's been good.  I've tried to make eye contact, be courteous, polite and friendly.  If I'm unstable where I'm riding, I pull to the side and signal for others to pass me.  In return I've been treated with greetings, smiles and nods, and given lots of space.

It was around this point that I realized I didn't have a single fogging issue, even after pedaling hard on a snow-covered off road trail.  My goggle modification was working perfectly.

I reached the entrance to the river (Actually, an artificial lake off the river) and cautiously rolled onto the ice.  I chose this location as it was a popular one for ice fishing.  If the ice is solid enough for people and sheds, it should be strong enough to support me.

I wasn't there long before I started feeling very nervous.  You see, falling through the ice would be very dangerous.  It's difficult to get back out and five minutes in the water can kill you.  I had no safety equipment to help me get out.  As I approached the huts I also noticed very few people ice fishing as it was a week day.  While the sheds were still there, I'd seen them fall through many times when abandoned by their owners.  I decided to err the side of caution and keep my trip very short.  Better to come back when lots of people were fishing, or when I wasn't by myself.  Or at the very least, some safety spikes to help pull myself back onto the ice.


So with some reluctance I hit the trail going back.

It was around this point that I noticed my energy drink had been turning to slush.  Riding in the off road area had caused me to bounce around a lot, which meant energy drink would make a thin coating all over the inside of the bottle.  That part would freeze almost instantly.  I had to shake it up in order to get the frozen sides off.  Normally a bottle is pretty good for an hour but within 45 minutes it was literally energy slush.

My water was faring much better.  The waterproof layer I had on wasn't breathable so it retained a lot of heat.  That heat kept my water warm enough to stay in a liquid state.  Each time I drank I made sure to blow air back into the nozzle, so there would be less chance of it freezing in the nozzle or attached hose.  Worked like a charm!

The rest of my ride took place on road.  Shoulders were decently plowed and back roads were pretty safe with most vehicles going slowly.

To be honest the only vehicle that got close to me was an Ontario Provincial Police cruiser.  I would have thought they would have given space, seeing as it is a big issue to move over for them when they are pulled over.  Guess not!  Ontario is going to be instituting a law to give cyclists room so it should be less of a concern in the future.  Three feet if travelling below 50 km/h, four if travelling between 50-80 km/h and five feet if travelling faster than 80 km/h.

At the conclusion of my ride I felt cold in my toes, but everywhere else I felt just fine.  I had been using my hiking boots as they were windproof but I think I had better start looking at using bulkier winter boots with a few sock layers.

I was feeling fairly victorious at conquering the cold temperature.  I decided to go for a selfie.  I assumed I would have some frost in my beard but I was not ready to see EPIC BEARD ICICLES!  I ran into the house to show Goldilocks.  She took an additional photo from the side.  I don't know how I managed to have an icicle form without noticing, let alone three separate instances!

The funny thing was I had stopped in a nearby town to catch my breath at a mid-way point.  People had been staring at me like I was from another planet.  I assumed it was because it was full blown winter and I was on a bicycle.  In retrospect it probably had more to do with the ice formations accumulating on my beard!

I figured they'd come off easily but I was surprised to find them frozen solid in place.  It took ten minutes in the house before they had thawed enough to come loose from my beard.  I could have got them off sooner with warm water but I wanted to see just how kick ass my beard icicles were.

I now consider a large unkempt beard to be an integral, essential part of my winter cycling experience.  The fact it had three icicles and I didn't feel it, is an testament to how well it performs as insulation.  Plus it means I don't have to spend time cleaning it up!


Friday 16 January 2015

Winter Wisdom: Winter Bicycles

My winter bike; studded knobby tires, disc brakes, pogies, I'm wearing a
hydrapak under my coat, front/rear derailleurs, front and rear mudguards,
energy drink in bottle cage.

Intro

Cycling in the winter was long considered a "hardcore" form of cycling but has been gaining in popularity.  There is a lot of advice floating around the internet about what sort of bicycle is well suited for winter cycling.  But for me, it comes down to what sort of components you are using, not the bicycle in general.

Tires

Bicycle tire technology has come a long way.  There are several types of tires that can keep you spinning in the icy cold.

  • Fat tires: These wide tires have been around for a few decades but have seen a recent surge in popularity.  The original fat tires were called Snowcats that had rims that were 44mm wide; they could be fitted to most bicycles capable of equipping a mountain bike tire.  The more recent incarnations come with a rim width of 80mm or more and require a specialized bike called a "Fat Bike."  The tires can be run at a very low pressure, enabling you to float on top of snow.
  • Studded tires: These tires literally have studs embedded in them.  Originally steel was used in production.  Most commercial production of studded tires uses tungsten carbine, an incredibly hard alloy.  There are also many DIY studded tire instructions on the Internet, usually by modifying a knobby tire with outwardly protruding wood screws.  Studded tires can dig into ice and provide solid traction.  While studded tires on cars are banned in certain jurisdictions, studded tires on a bicycle are usually exempt as they cannot cause the damage that studded tires on cars can.
  • Soft tires: These are bicycle tires made out of similar soft rubber compounds found on automotive winter tires.  They excel at providing traction at sub zero temperatures.
  • Knobby tires: Sometimes the best thing to use in shallow, sticky snow, knobby tires can be used for traction, just like in muddy scenarios.
  • Thin tires:  Instead of floating on top of the snow, a thin profile allows them to cut through the snow to where the pavement is.  Works best in clear roads and shallow powder snow.
  • Any tires: Sometimes the best tire for the job is the one you have.  If you commute where the road is dry or regularly gritted or salted, as long as you ride slowly and with caution, you should be just fine.
  • Combinations: You can get multiple features on one tire.  For example, there are studded fat tires.  My Ice Spiker Pro's are studded knobby tires.

Brakes

Braking technology moved in starts and stops (pun intended) since the very first bicycle.  There are many different types of systems; I will just speak generally about what I know.

  • Rim Brakes: A braking system where the brake pads are applied to the rim of the wheel.  These are a very poor choice for winter cycling.  While they're very easy to fix if they break down (again, pun intended), their proximity to the ground means the rim can be caked up with snow and ice.
  • Disc Brakes: This is a very popular type of brake for off road vehicles.  The disc is close to the center of the wheel, which means it is away from the ground and all the snow and ice.
  • Drum Brakes: These resemble drum brakes in cars.  As they are an enclosed system they do not suffer from poor weather conditions.
  • Coaster Brakes: I have fond memories of coaster brakes from my youth.  As it is an enclosed system it does not suffer from poor weather conditions.  It applies braking power to the rear wheel only.
  • Fixed Gear: Not a brake type per se.  But fixies and track bikes have a fixed gear where slowing the wheels can be accomplished by slowing the pedals.  In winter conditions you don't tend to be a speed demon so this can be accomplished easily.
  • Flintstone Brakes: Borrowed from a cartoon of the same name.  If you aren't familiar with it, they drove around in stone cars and would brake by putting their feet on the ground.  So in order to accomplish this, keep your seat lower so you can put your feet on the ground.  While I would never recommend this as a primary braking system, it can assist you while braking with other methods.  If done correctly it can help with stability too.

Protection From the Elements

So we've covered important things like traction and stopping.  But an often overlooked subject in winter cycling is protection from the elements.  Keeping yourself dry in the winter is very important.  Keeping your bicycle free of crud and salt is good for its health too!

  • Fenders: Coverings for front and rear wheels.  They are usually close fitting and cover a large expanse of your wheel.  They usually provide great coverage, keeping you and your bicycle dry.  An added flap on your front fender helps protect your bottom bracket.  I haven't seen many for wider wheels.
  • Mud Guards: If you have wider wheels, mud guards will be right up your alley.  They don't tend to provide as much coverage as fenders.  But as they are open, they don't tend to get clogged like a fender can.  Usually they won't protect your bottom bracket.
  • Chain Guards: This is like a covering for your chain.  There are different configurations which go from partial to full protection of your chain, in both permanent and temporary fixtures.
  • Pogies: Their name comes from a type of bait fish as they were originally designed for kayak paddles.  Several years ago they were adapted for bicycle use.  The great thing about them is they keep your hands out of the wind and can retain heat inside.  I find they are great as they allow you to fine tune the level of warmth you need.  For example, I'll put gloves in my pockets and ride bare handed; as I get colder I add a pair of gloves.  In the past I'd just wear the gloves and they' end up getting sweaty and uncomfortable; now I'm always warm and dry.

Gears

Bicycle gearing is definitely something to keep in mind when cycling in the winter.  It's an integral part of the drive train.  You do not want your drive train to go south on you while peddling around the frozen north!

  • Derailleurs: Having a variety of gears is great in the winter.  It enables you to take on various types of terrain with just the right amount of effort.  But because they are fully exposed to the elements, they are always at risk of being clogged.  Or worse, freezing!  Ways to mitigate this is to keep your drive train protected (mud flap on fender, chain guard) or to keep changing gears often.  Worst case scenario, try to keep yourself in a gear that you won't mind being stuck in!  Front derailleur freezes still gives you a fair amount of gear changes.  A frozen rear derailleur may affect the chain slack so you can't shift front or rear.
  • Internal Hub: As this is a completely enclosed system, it doesn't suffer from winter weather.  Gearing systems start at 3 speed and if memory serves, you can get ones that go up to 11 speed.
  • Fixed Gear or Single Speed:  There is no gear system here to freeze so there's no problem.

Water

It is very important to stay hydrated any time you are engaged in physical activity, including cycling.  More so in winter, when the air is dry and evaporated sweat may make you think you don't need as much.  In addition, lower temperatures will bring your bottle close to freezing.  Frozen water worse than no water at all; it weighs more and hydrates you exactly the same.

  • Water Bottles: You should be OK with water bottles so long as you are out for a small amount of time.  Assuming you fill the bottles with warm water, you have about an hour before frozen nozzles become an issue.  You can extend this period of time by making the water hotter beforehand.
  • Water Bladder: Namely Camelbak or hydrapak style systems.  These use a large vessel filled with water.  It usually dispenses through a hose to a nozzle.  The issue with these is the stream of water in the hose is very small with a large surface area in the hose.  This means it is very susceptible to freezing.  There are hose insulators out there but most reviews point to them being ineffective.  I've found two great ways to keep the water going.  One, keep the nozzle section inside your coat.  Two, keep the nozzle, hose, and the entire bladder inside your outer layer of clothing.  The latter is extremely effective.
  • Energy Drink: Not really water per se, but a great source of hydration, energy and electrolytes.  It also doesn't freeze as quickly as water.  I've found a room temperature energy drink will last an hour an a half when the mercury drops.  I usually keep on in a bottle cage and I drink that before I drink any water.
  • Thermos: Aka an insulated beverage container.  The nice thing about a thermos is you can put in soup or coffee for extended trips and have something that can warm you from the inside out.  They can be as simple as one that fits in a pack or something that fits in a bottle cage of your bike.

Lighting

In the winter days get shorter and nights get longer.  This effect increases as you get further north.  Go far enough and the night will last six months!  Around the 45th parallel daylight only lasts for a shade over 8 hours at winter solstice.  That's assuming no storms and no cloud cover.  This means most rides have an increased chance of occurring in the dark or low-light conditions.  The selections below are not exclusive, I would recommend all of them if you can.
  • Front Lights: Almost always a white light but there are a couple of configurations to think about.  There are lights that illuminate a large spot in front of you.  Others will "zoom" out and provide greater lumination at a distance.  Fortunately you can fit several front lights on a bike so you don't have to choose.
  • Rear Lights: Almost always a red light.  Usually there is a solid light and several blink settings.  They usually don't go really high in the lumen scale as they are used to be seen, not to see.
  • Head Lamps: In off-road situations it can be hard to look around as only the area in front of you is lit.  Having a head lamp on your helmet means you can still have a good range of visibility around you as the light is always shining where you are looking.
  • Visibility Lights: Whether you are on road or off road, you want to make sure to be seen by motorized vehicles.  Good front and rear lights can do this for you but you aren't limited to them.  There are several systems that can help you light up your frame and wheels.  One novel approach was to light up your wheel using a valve cap light.  I have some cheap red/white usb lights that I point downward to light up my bicycle.

Conclusion

So what's the best configuration?  There is none.  Do the best you can with what you can afford.  My icebike has knobbed studded tires, disc brakes, mud guards , pogies and front/rear derailleurs.  I have my main light system from my summer bike on (front 480 lumen spot, rear 5 led with lasers, backup lights to light up visibility).  I haven't had issues stopping nor traction concerns on icy surfaces or in shallow snow.  I have had my gears freeze (front one sucked; rear one really sucked), so I try to shift gears often to avoid freezing up.  For water I use all listed methods (bottle, bladder, energy drink, thermos); what combination I use depends on ambient temperature and how long I intend on being in the cold.

Many of these suggestions can be done on the cheap.  You can make your own studded tire, or stick to dry roads with a regular tire.  There are DIY instructions on making your own fenders and mudguards out of things like cans and pop bottles.  If you are decent at sewing you can make your own pogies.  You can get pogies cheaper if you shop around for scooter or ATV mitts (Apparently putting the word "cycling" on a box of pogies triples the cost).


Friday 9 January 2015

Closed Road Winter Cycling

Following snowmobile tracks along the river.
We recently had a fantastic winter day.  Cold but not too cold.  Snow that was light and powdery but not too deep.  In other words, the perfect day for a bike ride!

As much as I like to joke about being crazy for biking in Canadian winters, I don't think its far fetched at all.  Stop for a second and think... don't people do physical activity in the winter?  Snow shoeing, cross country skiing and skating are all winter activities that people participate in.  There are plenty of all-season activities that people do in the winter too, like running, walking and hiking.  So with that in mind, is winter cycling that crazy?  I don't think so.  But I digress; back to my ride.

No cars allowed!
Since I had a lot of success with the parkway last time, I thought I would give it another shot.  It's scenic, pretty fun to ride on and there's zero danger of becoming road kill.

There is a downside to a car-free environment.  It means you are pretty much on your own.  If you suffer a break down there is no ride coming to pick you up; you have to trudge out yourself.  One of my big worries was getting a flat.  Can you imagine trying to pump up tires with a hand pump when it's -30C?

Brief segue: I was chatting about this particular concern at my local bike shop when the owner gave me a CO2 pump free of charge.  Talk about an awesome store!

One of the things I find fascinating about this route is the rate of freeze going on with the river.  Despite living around rivers all my life, I've usually avoided going out and looking at them in the winter.  I have that stereotypical picture in my head of all bodies of water being frozen.So it feels a bit alien to see the water flowing while my breath is freezing to my beard.  You can also see the gradual freeze going on; shore, then solid ice, then slushy ice, then open water.  Or even more interesting, where the ice is super lumpy due to being formed while waves kept hitting the shore.

On the lake side things seem more frozen.  Closer to the main land there are people ice fishing.  I would really like to try biking on it; I'm willing to bet my studded tires handle the lake ice great.  But I don't know where the ice is safe or unsafe.  I also don't want to take the chance to bike on it solo; at least if someone else is there I can get help in case of emergency.

Speaking of people out in the winter, it's remarkably quiet here.  In the summer the parkway is full of people.  You see all kinds of cyclists in addition to runners, walkers, roller bladers, hikers and campers going from site to site.  Today the only other living soul I saw was a brave soul snowshoeing solo.

I made some really good distance and had almost made it to the other end of the parkway when I realized I would not be able to do it; I had three major problems.

The first big problem was with my water.  It's very important to hydrate in the winter due to the dry air.  You are also perspiring more than you think as the sweat will evaporate quickly. I had already burned through one 24oz bottle and had started working on the next one.

The next problem was food.  In the summer I usually have a variety of snacks, bars and gels.  I didn't bother on my winter rides because they have been shorter and bringing food wasn't necessary.  This time things were different; I had been out longer than normal and I could feel my strength ebbing and my appetite rising.  I knew the safe bet would be to turn around.

Last but not least... I was damn cold!  I was cold when I left the house but my physical activity quickly warmed me up.  But a chill had been creeping up on me the whole time.  Shorter rides haven't required extra layers of clothing; now I know longer rides means bringing more layers.  I'm glad I turned around when I did because I was completely frozen when I got home; I can only imagine what kind of bad shape I'd be in if I just continued.

So next time, extra water, extra food, chemical hand/toe warmers and some extra layers in a bag.  Even if I'm not intending on being out long, I might have mechanical issues or stuck for some reason and out longer than anticipated.  Frankly I'd rather be over-prepared than under-prepared.

All that being said, it was a really great day for a winter ride.  I was really cold when I arrived at home but it was nothing a hot shower couldn't fix.

Since I know you weren't tortured enough by my poor video skills last time, I made another time lapse video using footage from this winter cycling trip.  At least this time there was no frozen ice on the lens and you can see terrain for the most part.  There are times when I'm focused a lot on the area directly in front of my bike; it's because riding in vehicle tracks in snow can be dicey at times.


Tuesday 6 January 2015

Snowstorm Cycling

If it were just a bit warmer it would be shorts weather.
I've had a couple of setbacks with winter biking.  The biggest one thus far is the... well... lack of winter!  We've had a few snowfalls but they all melted quickly.  We just had a green Christmas in my area, which is extremely rare.

My other problem has been my freehub on SubZero.  When it is left outside and it gets very cold, it freezes up and doesn't engage anymore.  I've been told it has a pretty cheapo freehub right now that's probably not serviceable.  I've started keeping it inside but eventually I will need a new freehub.    I've been shopping around for some used wheels, but in the meantime my quick fix is working.

When we finally had a snow fall and my free hub wasn't acting up, I was eager to get out there.  The fact that there was a snow storm didn't really deter me.  It wasn't a light dusting either, it was complete with strong weather advisories insisting that people stay home.  Pffft... challenge accepted!

Two or four wheels, you had to be a bit crazy to be out in this.
Some people were taking the weather advisory very seriously.  In my time out I saw just one car driving around.  I'm pretty sure we both gave each other the "Are you crazy?!" stare.

I headed in the direction of a nearby parkway.  In the wintertime, the parkway gets closed.  They put barriers up to prevent cars from entering and they cease snow removal or any other winter maintenance.  It works out well for me, there is no danger of a car sliding into me.

Along the way there are regular roads and a trail.  The road conditions were very icy.  This was not a problem for my Schwalbe Ice Spiker Pro tires.  Those tungsten carbide studs really dig into ice.  The trail had other surprises in mind.  A few snowmobiles had packed down part of the trail.  Boot and canine prints hinted at the presence of dog walkers.  I figured riding on the snowmobile tracks would be easier as the snow was packed down.  Unfortunately I sink deeper than snowmobiles do.  Also whenever their tracks would cross each other, It results in fun things like your front tire following the the track to the right while your rear tire follows the track to the left.

Snow melted on the lens and refroze, contributing to the blurry part.
Eventually I made it to the parkway where it was a bit easier to ride.  The parkway is made up of several islands connected by causeways and low bridges.  While there was some snow accumulation, it would also blow around in odd ways.  So the road was a bit icy, or bare pavement or powder snow.

The downside of riding the parkway is your exposure to the elements.  You have a small lake on one side and a very large river on the right.  Large enough that it has fast currents and is extremely deep in areas.  So parts of the river are not frozen.  So in a windy snowstorm there is a lot of spray which flash freezes.  So when I went by these sections, I felt like my face was being sandblasted.  I quickly learned to skirt more towards the lake side, which was not trying to flay the skin off my face.

I've been told the parkway is popular with winter activities.  Snowmobiles and ATV's top the motorized list but there are a sizable number of cross country skiers, snow-shoers and others.  I'm hoping to encourage some winter cycling on here by way of example.  At the very least, I'll probably be one of the very few to complete Strava segments on here from December to March.

UPDATE: and a little bonus, a crappy video I made, yay!  Because the footage had the frozen chunk on it, it didn't turn out great.